header

header

Sunday 25 November 2012

First glass painting class: fun!

My first glass painting class with Brian Waugh was last week, and I've been so busy I haven't had time to tell you about it. Well, first things first: it was really fun! Brian is an excellent teacher, and was very patient even when I was being especially thick.

Brian works out of a studio that hosts several other glass artists. The studio space also has ceramics folks, so I'm betting if I wanted to get my hand back into the ceramics game, I'd probably be able to. Which is nice to contemplate, although I have to say, what with learning this new aspect of glass art, my plate is pretty full!

So, on to the glass painting. Even though it was an all-day class, it became obvious very quickly that 8 hours only allowed us to scratch the top few snowflakes off the iceberg. I've got a lot to learn.

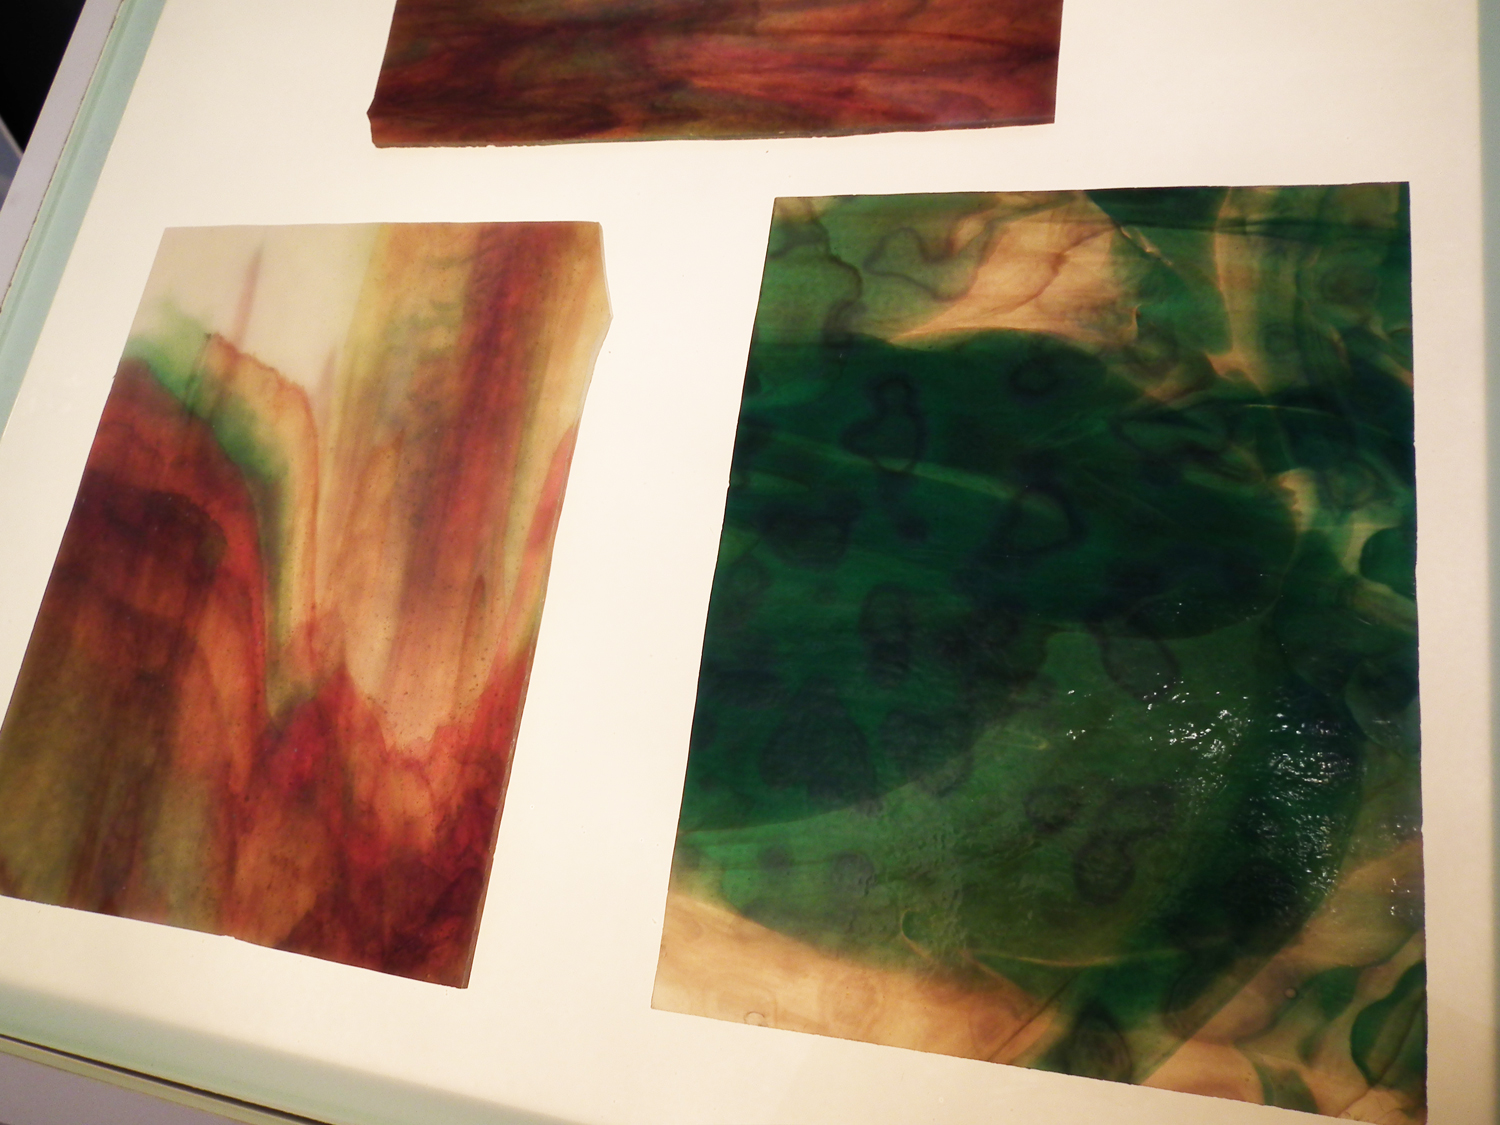
With glass painting, you do a firing for every different layer. It's really painstaking, kind of like painting with watercolours, only glass painting is a way more lengthy process.

First, you mix the powdered paint on a palette with water, then brush it on in a very thin layer as a base colour. You use a badger brush to smooth the paint and get an even matt finish.  After that dries, you fire it. After the first firing is done, you do the line work. This is like a line drawing, only done with a thin brush instead of a pencil or pen. Then that layer is fired.

Then you lay on successive layers of paint, glazes and enamels to create a 3-D effect. Each new layer has to be fired. Before you fire each layer, you use different types of brushes to take away dried paint on the highlighted areas, and it ends up looking kind of like really detailed etched copperplate prints.

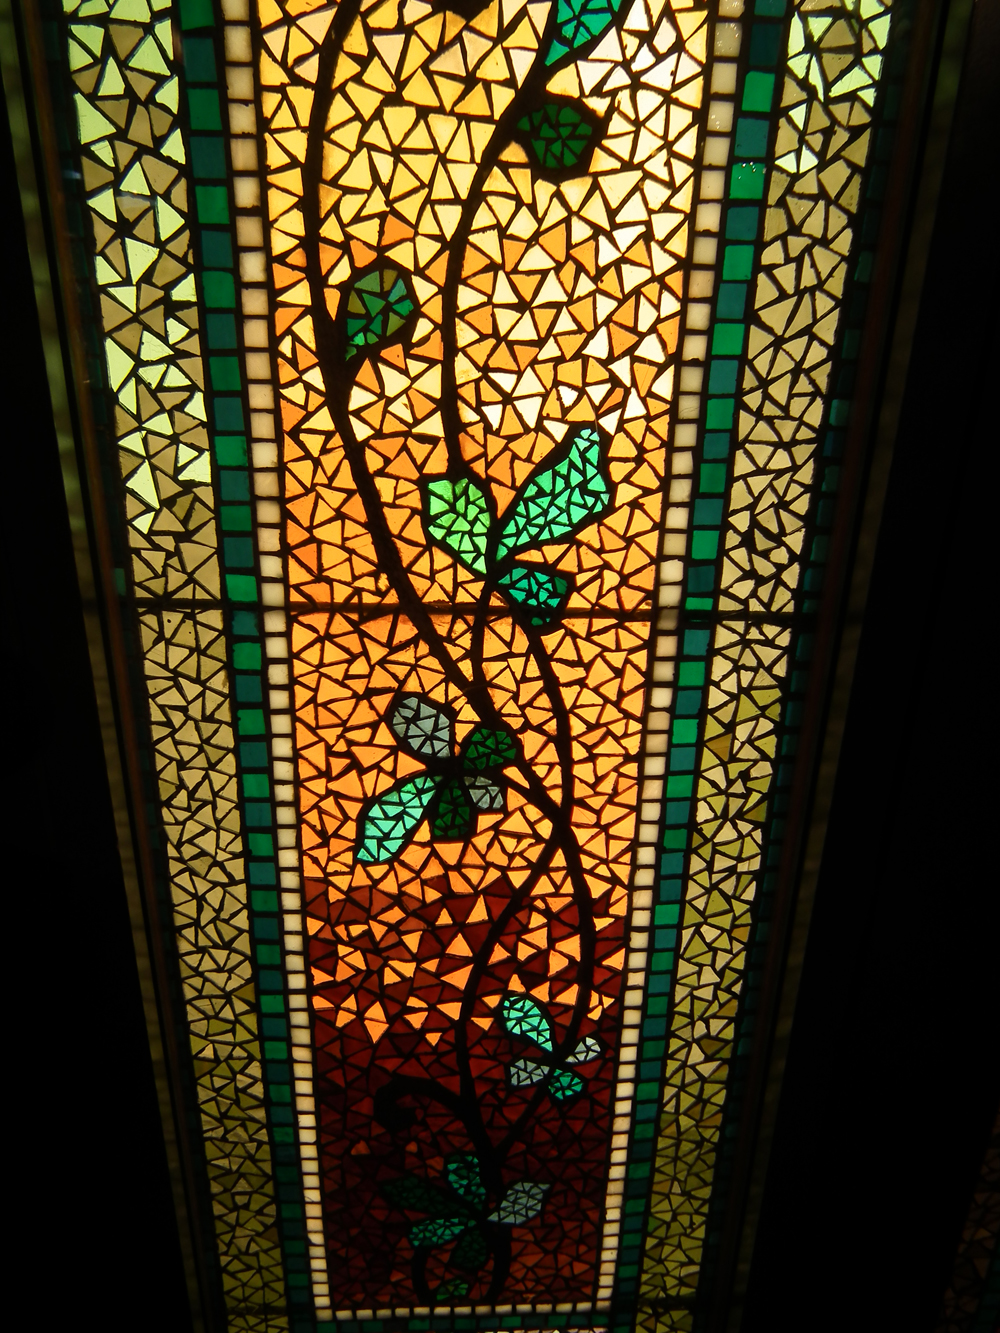
You can see what I'm talking about in this one by Harry Clarke (a stained glass artist who I totally worship!)

"The Consecration of StMel, Bishop of Longford, by St. Patrick," by Harry Clarke. You can see the "etched" looking parts of the faces where a brush took dried paint away.

Fortunately Brian has a kiln that can do a firing in 1.5 - 2 hours, which I guess is unusual - most glass artists have kilns that can only do 1 firing a night, which seems bonkers to me. How does anyone get anything done??

I'm meeting up again with Brian in 2 weeks, and I have to have a design done for a larger piece by then. I'm working on drawing a concept I thought up, but so far it's only in the very early stages. If the finished piece comes out how it looks in my head, I'll be pretty happy. (But then, how often does that happen, really?)

Ah well. All you can do is your best. And it helps to have a good teacher! Pin It Now!

Tuesday 30 October 2012

I've never been so excited about an all-day class in my life!

Oh my god, OH MY GOD, y'all. I am SO EXCITED!

Because he's the Best Husband in the World, The Scotsman is getting me a one-to-one, all-day stained glass painting class with the amazing stained glass artist Brian James Waugh. Here's one of his pieces. Check out the detail in the painting on her dress!

Detail, "Autumn" stained glass panel by Brian James Waugh


"Autumn" stained glass panel by Brian James Waugh

To say I'm excited would be the world's biggest understatement. My class with Mr. Waugh is in November.  I can't wait!!


Pin It Now!

Sunday 7 October 2012

Finished Octopus

Woo hooo! I finally finished the stained glass octopus that I've been working on since...let's see....JULY!?

I constructed the frame out of zinc came after The Scotsman very kindly bought me a hacksaw (you know it's love when he buys you a hacksaw!) and built me a perfect 45 degree angle mitre box. Because it was made to accommodate a wood saw, the woodworking mitre box that was available at B&Q had too wide a channel, which would have made for inexact cuts.

The zinc frame really makes the piece look more finished.

We've also been blessed with a rare sunny day here in Scotland, so some of the beautiful details in the antique glass are a bit more visible.
See the golden glints in the glass of the octopus' face?
See the golden glints in the glass of the octopus' face? This antique glass is amazing.
Another angle
Another angle


Sun shining through!

Those suckers on the tentacles took FOREVER!
Those suckers on the tentacles took FOREVER.

Although of course there are many things I feel I could have done better on this piece, I do have to say that I'm happy that I've finally started to achieve edges that are more straight than I managed before. My cutting and soldering skills are getting better, but I still have a long way to go.

Nevertheless, this was a really challenging piece that took a huge amount of work, and I'm pretty happy with the way it turned out. The next one will be better! Pin It Now!

Sunday 30 September 2012

Abstract Schmoo Shapes

Hey, everyone! I was in The Netherlands last week to meet with some colleagues, and at one point during the meeting I was idly doodling on my pad (as I tend to do) and drew this little design of sort of Schmoo shapes in a row.

After the ridiculously intricate and time-consuming design of the octopus, I thought it would be nice to have a relatively simple design that I could finish in a weekend. To try and make the curves as smooth as possible, I laid it out in the free drafting software Solid Edge 2D.

So, here it is:

Schmoo shapes abstract stained glass


The piece is 12" x 12". Unfortunately it's not a very sunny day here in Scotland, so the colours aren't looking as bright in the pictures as they do in person. The purple bit is a deep, grape-y colour, and the orange is Spectrum wispy glass.

Here's another view:

Schmoo shapes abstract stained glass


Pin It Now!

Sunday 23 September 2012

I made a stained glass octopus!

UPDATE: You can see the finished, framed piece here.

Hi all! Good news: today I finished soldering the stained glass octopus that I've been working on for what seems like forever.

I still need to put the lead came "frame" around the outside edges, and The Scotsman has said that he'll construct an actual wood frame for the piece. I also need to do the final cleaning to get off the fingerprints and winkle the last of the flux out of all of the little nooks & crannies. The piece is about 16.5 x 11.7 in.

I was just so happy to get it (mostly) done that I wanted to post some pictures!


The stained glass octopus with some sun coming through it. I wish you could see it in person, it looks so much cooler than photos can show.
Here's the soldering in progress. It's all full of flux.


Stained glass octopus, reverse side. He kind of looks like he's doing the Safety Dance.

A little closer up on the tentacles
Tentacle action!
So, what do you think? Would you hang it in your window? Pin It Now!

Sunday 16 September 2012

Octopus in copper

Hi everyone!

I've been working on the stained glass octopus all weekend, and I finally got all of the frillions of little suckers and pieces foiled. I'm waiting on delivery of some black glass paint to do the pupils of the octopus' eyes. (Right now I've coloured them in with black sharpie for demonstration purposes.)

Stained glass octopus: all coppered up!
All coppered up!
All those little suckers took FOREVER.
I'll be soldering and finishing the piece next weekend. Whew! This one took a while. Pin It Now!

Sunday 9 September 2012

Octopus Progress: finally finished cutting!

Knock, knock.

Who's there?

Unfinished octopus.

Unfinished octopus who?

Unfinished octopus is happy to announce that despite being unfinished, at least all of those suckers are finally cut! Oh, my aching tentacles.

Hi everyone, yes, I'm still working on this never-ending stained glass octopus project. I did finally finish cutting it all out today, and even got a start on foiling.

If you recall, this is how the octopus was looking last week:


After being harangued by the Shouty Muse for the whole week, I decided the lower tentacle on the left needed to be longer, and speaking of creating multiple rods for my own back, I also decided that there needed to be another line of suckers on the left to balance the whole thing out. Why yes, I would like to do a whole lot more cutting on this piece! Thank you sir, may I have another!

New formula with 1/3 more suckers! 

So, yes. I finally finished cutting today. After much rejoicing at the prospect of not having to cut any more of those teeny little suckers, I got a start on foiling....all of those teeny little suckers.


Getting started on the copper foiling. This is going to take a while.

I really do love how the copper foil looks, though!

I knew this piece was going to take a long time, but I think I may have underestimated just how much time it was going to take. I sure do hope it turns out.

I think I'll name him Harold.

See you next time!


Pin It Now!

Sunday 19 August 2012

More Octo Progress

Hey everyone! This weekend I made some good progress on the stained glass octopus I'm making. I ended up not working on it last weekend, because last weekend was sunny. In Scotland.I know, shocker! Thing is, when it's sunny out on a weekend in Scotland, it's kind of The Law that you have to do something fun outdoors. Because the next sunny weekend might come....never.

So, on both Saturday and Sunday last week, we took the boat out on Loch Lomond. Sunday we had a picnic on Inchconnachan Island (no wallabies sighted, but we did see some wallaby poo on the beach where we picnicked. We were able to positively identify said poo after we got home. Go ahead and Google "wallaby droppings," and you'll be presented with lots of images of the real article. God bless the Internet!)

Here's a view of one of the islands in Loch Lomond from our as-yet-unnamed boat:

A gorgeous day on Loch Lomond, The Trossachs
This weekend the weather went back to its normal dreich, rainy craptasticness, so it was totally on with the octopus.

Here's how far I got on Saturday:

Octo-progress!
And then I did a bunch more on Sunday:

More progress - note the "Sucko-matic" fume extractor the Scotsman built for me in the background.

Getting there - next up, the last tentacle with all of the suckers. Shudder.
That lower tentacle is probably going to need some re-working. I started getting tired and just jamming whatever shreds I could find in there, which Will Not Do. I should force myself to just knock off working when I start getting really tired. I just make mistakes.

Speaking of mistakes, here's a small FYI for anyone who is thinking about doing stained glass as a hobby: be ready to get lots of cuts on your hands. Lots. Seriously. When you work with glass, you start to look like a mad paper cut fetishist. Owie!

That's about all the news. See you next time, when I'll (hopefully) have that upper tentacle finished and the copper foiling underway!

Pin It Now!

Thursday 9 August 2012

Octopus progress

Hi all, I made a bit of progress over the weekend on the stained glass octopus I started last week. One of the things that still perplexes me about cutting glass is how you can cut and cut for hours and it barely looks like you accomplished anything at all!

Although it doesn't look like it, I really did get quite a bit done. I plan to put lots more time toward it this weekend coming up. Just got to keep plugging away until it's finished.

First, I got started on the water background. I decided that the background needed to have a more emphatic design element to it, so I added a circle behind the octopus. The clear glass is Spectrum clear baroque, and the blue circle element is pale blue Spectrum baroque. I chose these because of the lovely swirls in the glass, so suggestive of underwater currents.

Hours and hours of cutting - looks like I barely worked on it at all!

Then I cut another one of the tentacles and added in the yellow eyes.

Yellow eyes - I plan to paint in the pupils.

Can't wait to get started on the little suckers. Except for the "can't wait" part. Eeep!
Wish me luck, and see you next time! Pin It Now!

Sunday 29 July 2012

Light Box, Octopus First Cuts

Hello there! Last weekend was my birthday and The Scotsman pulled out the stops. Among other presents, he built me a totally awesome light box for my glass.

New light box built by The Scotsman for my birthday. Best husband ever!
I love it! It makes it much easier to trace designs and see through darker glass to cut to a pattern.

If you remember, I mentioned that I bought a ton of antique art glass when I was back home in the States in June. I've taken pictures of just a few of the pieces I got. You can almost see how beautiful they are when they're pictured on the light box, but my usual caveat still holds true: pictures just can't do glass justice.


Here's the design I drew for my newest piece. As you can see, it's much simplified from the photograph I posted last time.


I started cutting today. Since I got a bit of a late start I haven't gotten as much done as I wanted, but I'm already really happy with the way it's coming along. As you can see, I chose a ring mottled dark red and white glass for the octopus' skin. 


As you might also be able to see, I added cut lines to the tentacles. These will make it easier (and in some cases, at all possible) to cut these. 

I'll post more next weekend when I've gotten more done!


Pin It Now!

Saturday 14 July 2012

Abstract Under-Water Wave, Octopus Inspiration

Hi everyone! I did manage to make one piece before I left on holiday (and remembered to take pictures of it, miracle of miracles.) This piece was inspired by a photograph I saw of a tube wave as seen underwater. I used some of the new ring mottle glass my darlin' Scotsman picked up for me as a surprise. Click on any of the images to see a larger version.

Abstract underwater wave stained glass piece
Abstract underwater wave

Ring mottle glass, with a piece of wispy white glass below it

I gave it to my Mom and we brought it in to be framed. Unfortunately you can't really see the frame, it's a wood frame that has a kind of weathered gunmetal grey finish that goes really well with the glass colours and the un-patina'ed lead solder (I didn't use the black patina, so the leading is kind of silvery). 

Unfortunately also it wasn't a super sunny day when I took the pictures, so you can't see how the glass glows when lots of light is coming through it.

I think if there's one thing I've consistently found in making stained glass, it's that photos really can't ever do a glass piece full justice. Pieces of stained glass are almost like living things; they change and do different things as circumstances change.

And now, here's the inspiration for my next piece:


I got a bunch of absolutely gorgeous antique stained glass at the Milwaukee Stained Glass Studio while I was back home (more about that in a minute), including some pieces that I think will be amazing as the skin of this octopus. 

Why am I embarking on this clearly nightmarishly difficult design, after all of the trials and tribulations I went through with the squid? Because obviously, I am insane to even consider it. This one is about 100x as ambitious as the squid.

I guess I just can't stay away from the tentacles, folks. Wish me luck.

Before I go, I want to tell you about this dream-like glass shopping trip I had at the Milwaukee Stained Glass Studio. You know the part in Willy Wonka and the Chocolate Factory when they do the big reveal of the candy room? 


Imagine that, only with glass. 

They have a huge stock of antique stained glass that they got from the estate of a very, very wealthy stained glass hobbyist whose motto was apparently "There's no such thing as too much antique art glass." I think he may have had a teeny bit of a glass hoarding problem (something I would know absolutely nothing about. Stop looking at me like that, I NEED every single piece of glass I've got. Need it. Shut up.) 

Anyway, sadly, the wealthy glass hobbyist passed away, but happily, the Milwaukee Stained Glass Studio got to buy his entire stock of glass. They have a WAREHOUSE full of this precious stuff, all different kinds of art glass, the kind that no one is ever going to make again. 

My god, I could spend several fortunes in that place. The only thing that restrained me from going even more bonkers with my credit card was that I knew I was going to have to carry anything I bought back to Scotland in my carry-on case. If that hadn't been the case, people, well, it would have been a bit of a financial apocalypse for Your Narrator.

And that's about all the news here. Hope you're all enjoying your Saturday!


Pin It Now!

Sunday 8 July 2012

Smith Museum of Stained Glass!

Hi all, I've been away on holiday back to the States. One of the highlights of the trip was our visit to the Smith Museum of Stained Glass Windows at Chicago's Navy Pier.


I highly recommend you stop in if you find yourself in Chicago and you're a fan of stained glass. Admission is free, and you certainly can't beat that! As always, photographs can only provide an approximation of what stained glass pieces look like in person. Just figure, whatever you see below, it looks 100 times cooler in person.


Here are just a few of my favourite pieces from the Museum:

Fairy Tale of the Bear Attacking Other Animals, 1997.  Mosaic designed and fabricated by Khaim Pinkhasik.


Autumn Landscape, c. 1890. Design attributed to Agnes F. Northrup, fabricated by Tiffany Studios, New York. Smith Museum of Stained Glass Windows, Chicago. 
  
Flowers in a Ribbon Frame, 1880s. Designed and fabricated by Belcher Mosaic Glass Company, Newark, New Jersey. 


Dragon Window, 1991. Designed and fabricated by Theodore Hile (born 1950) and Robert Fronk (born 1958), Peoria, Illinois. The reuse of fragments from other windows is intentional in this collage style window. Some experts have called this type of assemblage, "postmodern stained glass".

Evening Landscape, c. 1910. Design and fabrication attributed to Louis Comfort Tiffany, Tiffany Associated Artists, New York. 


George Grant Elmslie Window, 1920. 

Detail, George Grant Elmslie Window, 1920.

Landscape With Waterfall, c. 1920s.  Design attributed to Agnes M. Northrop and fabricated by the Tiffany Studios, New York. 

Detail, Landscape with Waterfall.

Landscape with Yellow Sky (c. 1915).  Designed by Agnes F. Northrop and fabricated by the Tiffany Studios, New York .


The Four Seasons, c. 1907 - 08. After Alphonse Mucha by an unidentified artist and fabricator, possibly Mucha himself or under Mucha's supervision. 


"Sharks Teeth," c. 1890. Unidentified designer and fabricator. This highly abstract composition consists of a great curled vine in a frame of carefully color matched roundels enclosing a field of "shark's teeth", arrayed in graduating colors from white to various pinks to yellow and rose. Smith Museum of Stained Glass Windows, Chicago.

Fairy Tale of the Snowgirl, 1994. Designed and fabricated by Khaim Pinkhasik. Based on the Russian fairy tale told to Khaim Pinkhasik as a child, the nocturnal scene depicts Father Winter in full white beard in a snow filled landscape, the center of which is a Christmas tree with its star full ablaze. In the foreground, Daughter Snow is holding a lantern while all around her animals of the forests come out to look.

Two Flower Panels, Smith Museum of Stained Glass Windows, Chicago.

Pin It Now!